
- Help Center
- Users and User Groups
- Single Sign On
Azure SSO Setup Guide
Full walk-through to setup and enable Azure SSO with Tovuti.
Step 1: Create the SSO Record in Tovuti
- Go to People > click Single Sign-On > click New

- Enter Title and Details
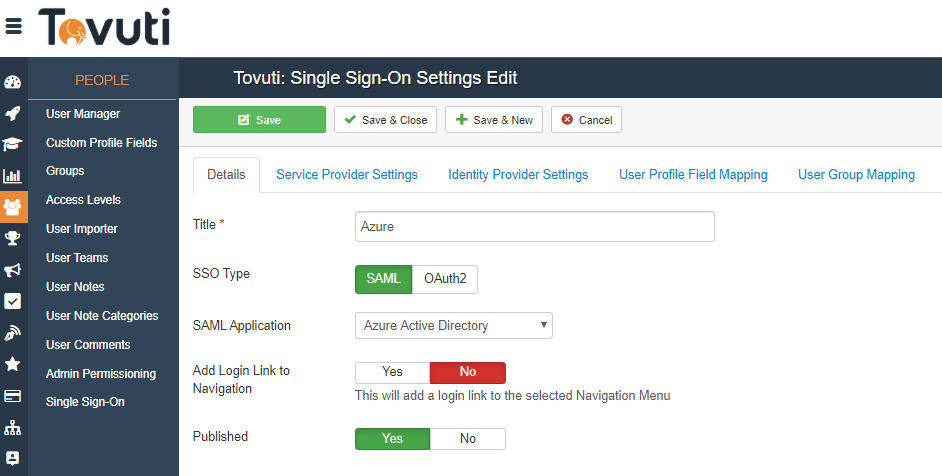
- Go to the Service Provider Settings tab > a unique EntityID/Issuer will be created for you

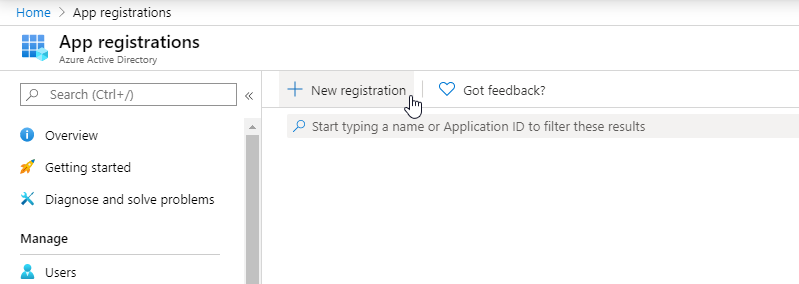
Step 2: Configuring Azure Active Directory
Go to and login to portal.azure.com.
.png)
Select Azure Active Directory
.png)
Select App Registrations

Select New Registration
Name your SSO and paste the SP-EntityID / Issuer from point 3 from Step 1
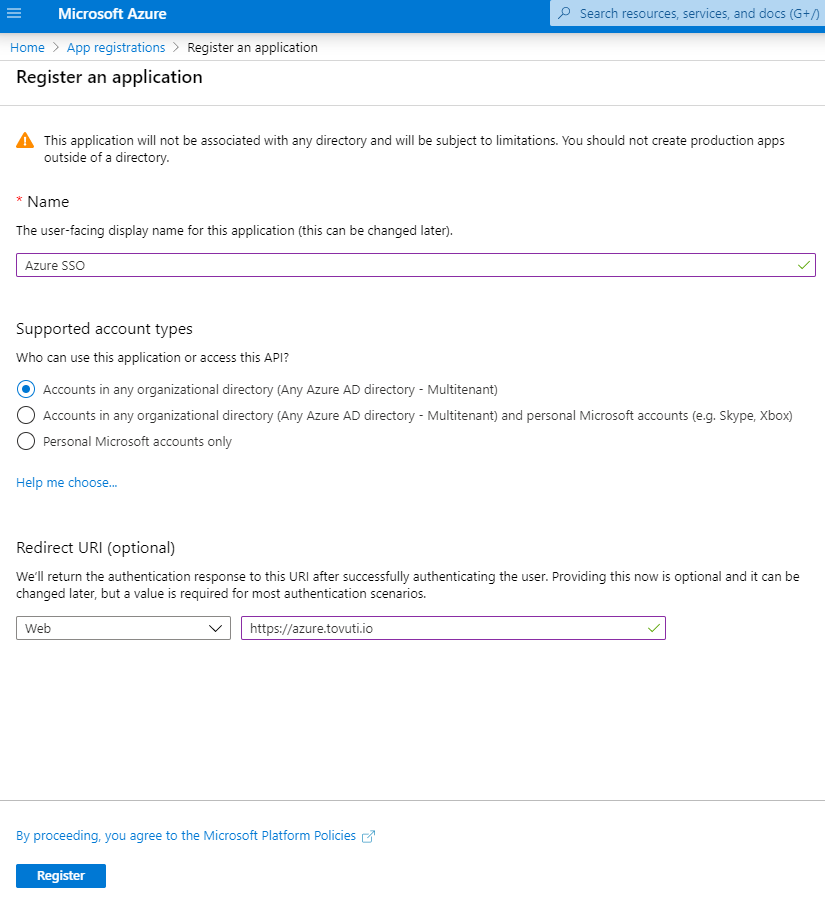
Click Register
Open the new SSO, select Application ID U R I and paste in the SP-EntityID / Issuer, set it
.png)
.png)
.png)
After saving, go back to the SSO and select Endpoints. Find the Federation Metadata document (XML) and copy it.
.png)
.png)
Paste the xml link into Tovuti Import SAML Settings, click Import and click Update. Then Test Connection.
.png)
(Make sure to run multiple tests to ensure that all of your settings are correct)